You Can Build Real Apps With Claude — Even With Zero Coding Experience
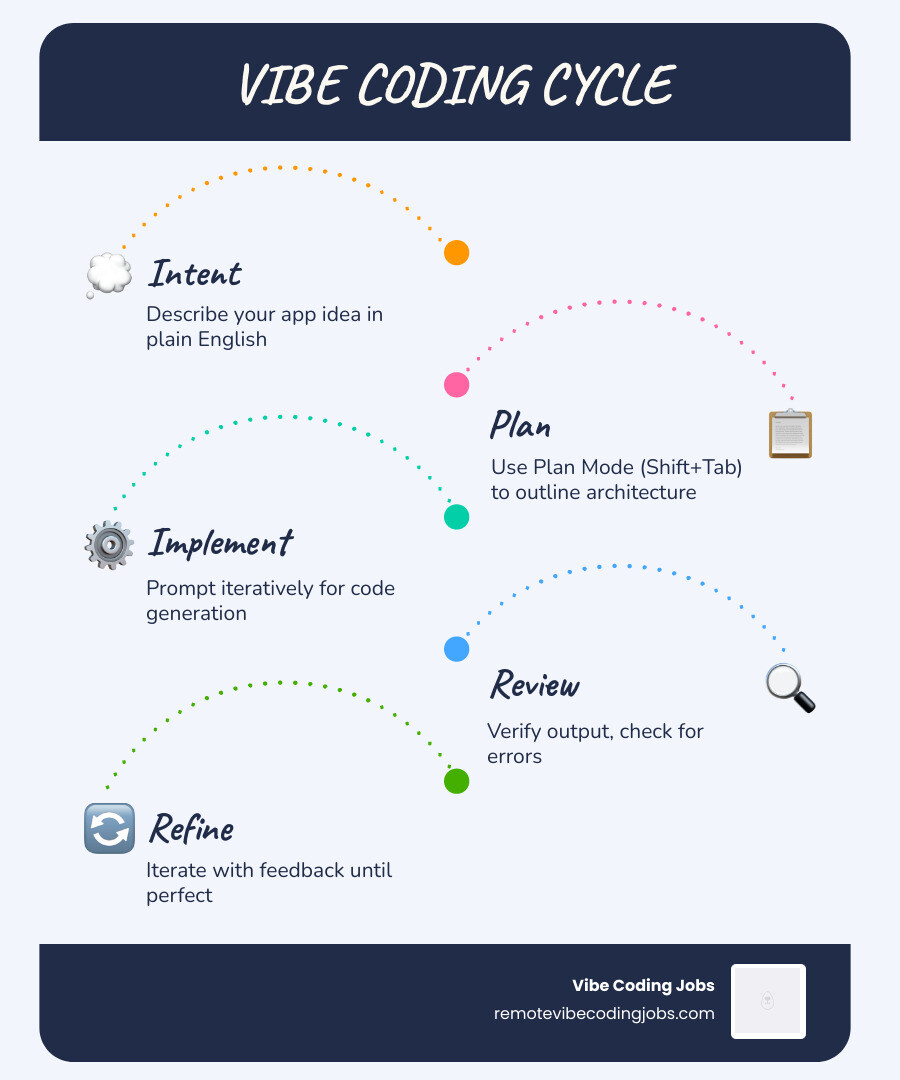
How to vibe code with Claude comes down to five core steps:
- Install Claude Code — run
npm install -g @anthropic-ai/claude-codein your terminal - Set up your project — create a folder, initialize Git, and run
claudeto authenticate - Create a CLAUDE.md file — give Claude persistent context about your project, stack, and conventions
- Use Plan Mode — press Shift+Tab twice before every feature to outline steps before any code is written
- Prompt iteratively — describe what you want in plain English, review the output, refine, repeat
That’s the core loop. Everything else is just getting better at each step.
Vibe coding is a term coined by AI researcher Andrej Karpathy in early 2025. The idea is simple: instead of writing code line by line, you describe what you want in natural language and let an AI handle the implementation. You focus on the outcome. The AI handles the syntax.
It sounds almost too easy — and honestly, for small projects, it kind of is. One non-coder built a sortable LinkedIn analytics dashboard from a CSV file in under a minute. Another person went from a messy spreadsheet to a fully searchable database in under two weeks. No prior programming experience required in either case.
But here’s the honest truth: vibe coding is easy to start and hard to scale without the right workflow. Most beginners hit a wall because they dump one giant prompt into a chat window and end up with a tangled mess of code they can’t maintain or fix. The shift from using AI as a helper to building entire apps with AI feels uncomfortable at first — but with the right structure, it clicks fast.
Claude, specifically, has become the go-to model for serious vibe coders. Its 200,000-token context window means it can hold your entire codebase in memory at once. And unlike some competitors, give Claude 20 constraints in a prompt and it honors all 20.
We at RVCJ Editorial cover AI-assisted development workflows and have tracked how developers are using tools like Claude Code to ship production apps faster — including everything you need to know about how to vibe code with Claude from a standing start. In the sections below, we’ll walk you through the full setup, the exact workflow, and a hands-on tutorial so you can build your first app today.
What is Vibe Coding and Why Use Claude?
At its heart, Vibe Coding | ClaudeLog is a development tactic where we detach from the microscopic details of syntax and focus entirely on the “vibe” or the outcome of the software. Instead of worrying about whether a semicolon is in the right place or if we’re using the correct version of a library, we act as the high-level architect.
Why is Claude the undisputed heavyweight champion of this movement? It comes down to three things:
- Reasoning Depth: Claude doesn’t just autocomplete text; it understands logic. While other models might struggle with 10+ complex instructions, Claude has been shown to honor up to 20 constraints simultaneously without “forgetting” the middle ones.
- The 200k Context Window: Imagine trying to write a book but only being able to remember the last five pages. That’s what smaller AI models feel like. Claude can “read” your entire project folder, including all your code, documentation, and data, allowing it to make decisions that actually make sense for your specific app.
- Instruction Following: In Scientific research on AI developer productivity, it’s noted that the demand for AI-proficient developers has grown by over 30% year-over-year. Claude leads this pack because it is designed to be helpful, harmless, and honest, making it less likely to generate “hallucinations” (AI-made-up nonsense) than more “creative” models.
Vibe coding allows us to build MVPs (Minimum Viable Products) in minutes. For example, some users have reported reducing a complex payment race condition fix—a task that usually takes a full day—down to just two hours using a Claude-driven workflow.
Setting Up Your Environment: How to Vibe Code with Claude Code
To start your journey into how to vibe code with Claude, you need to move beyond the simple chat window on the website. Professional vibe coding happens in your Terminal.
The Terminal (or Command Prompt) is just a text-based way to talk to your computer. Don’t be intimidated; Claude will guide you through most of it.
Prerequisites for How to Vibe Code with Claude
Before we start “vibing,” ensure you have these four things ready:
- Claude Pro/Max Account: Vibe coding requires heavy lifting. The free tier will run out of “gas” (usage limits) almost instantly.
- Node.js: This is a tool that lets you run JavaScript on your computer. You’ll need it to install Claude Code.
- Git: This is your “Save Game” button. It tracks changes in your code so if Claude breaks something, you can simply “rewind” to when it worked.
- A Code Editor: We recommend VS Code or Cursor. Even though Claude does the writing, you’ll want a place to look at your beautiful new app.
Installing the Claude Code CLI
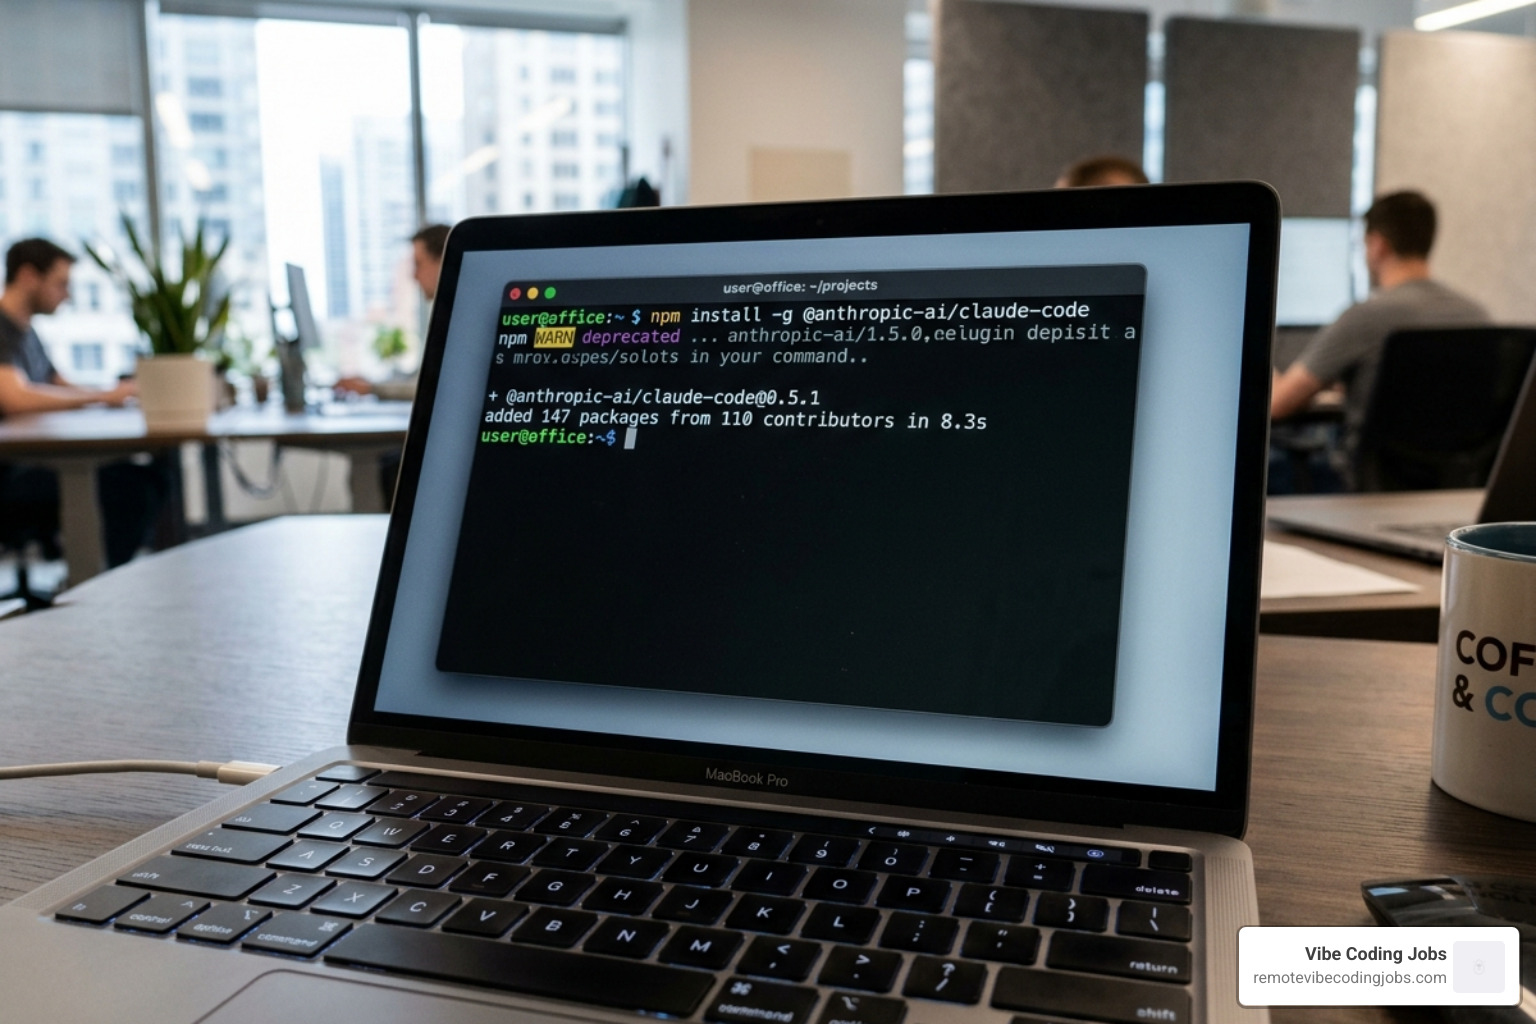
Claude Code is an “agentic” tool, meaning it can actually do things on your computer, like creating files and running tests. To install it, open your terminal and type:
npm install -g @anthropic-ai/claude-code
Once installed, navigate to the folder where you want to build your app and type claude. You’ll be asked to authenticate with your Anthropic account. From this moment on, Claude isn’t just a chatbot; it has filesystem access and can see exactly what you’re working on.
The Vibe Coding Workflow: Plan Mode and CLAUDE.md
The biggest mistake beginners make is asking Claude to “build a whole app” in one go. This is a recipe for disaster. Instead, we use a structured workflow involving two secret weapons: Plan Mode and CLAUDE.md.
| Feature | Purpose | How to Trigger |
|---|---|---|
| Plan Mode | Outlines steps before writing code to catch errors early. | Press Shift+Tab twice or type /plan. |
| CLAUDE.md | A “memory file” that tells Claude how to behave in this project. | Create a file named CLAUDE.md in your root folder. |
| Direct Implementation | Claude just starts typing code immediately. | Standard prompt (use only for tiny fixes). |
Creating an Effective CLAUDE.md File
Think of CLAUDE.md as the “Employee Handbook” for your AI assistant. It should include:
- Project Overview: “This is a CLI task manager for tracking my daily chores.”
- Tech Stack: “Use Node.js and simple JSON for storage. No fancy databases.”
- Coding Conventions: “Always use functional programming and descriptive variable names.”
- Build/Run Commands: “To run the app, type
node index.js.”
When Claude starts a session, it reads this file first. This prevents it from suggesting a different programming language or a complex setup you don’t want.
Mastering Plan Mode for Better Results
Before you let Claude touch a single file, you should always enter Plan Mode. This forces the AI to think through the architecture.
A pro tip from the community is to type ultrathink at the end of your plan request. This encourages Claude to use “chain-of-thought” reasoning, exploring multiple ways to solve the problem before picking the best one. This “revving the engine” phase saves hours of debugging later by preventing incorrect implementations from ever being written.
Step-by-Step Tutorial: Building Your First App
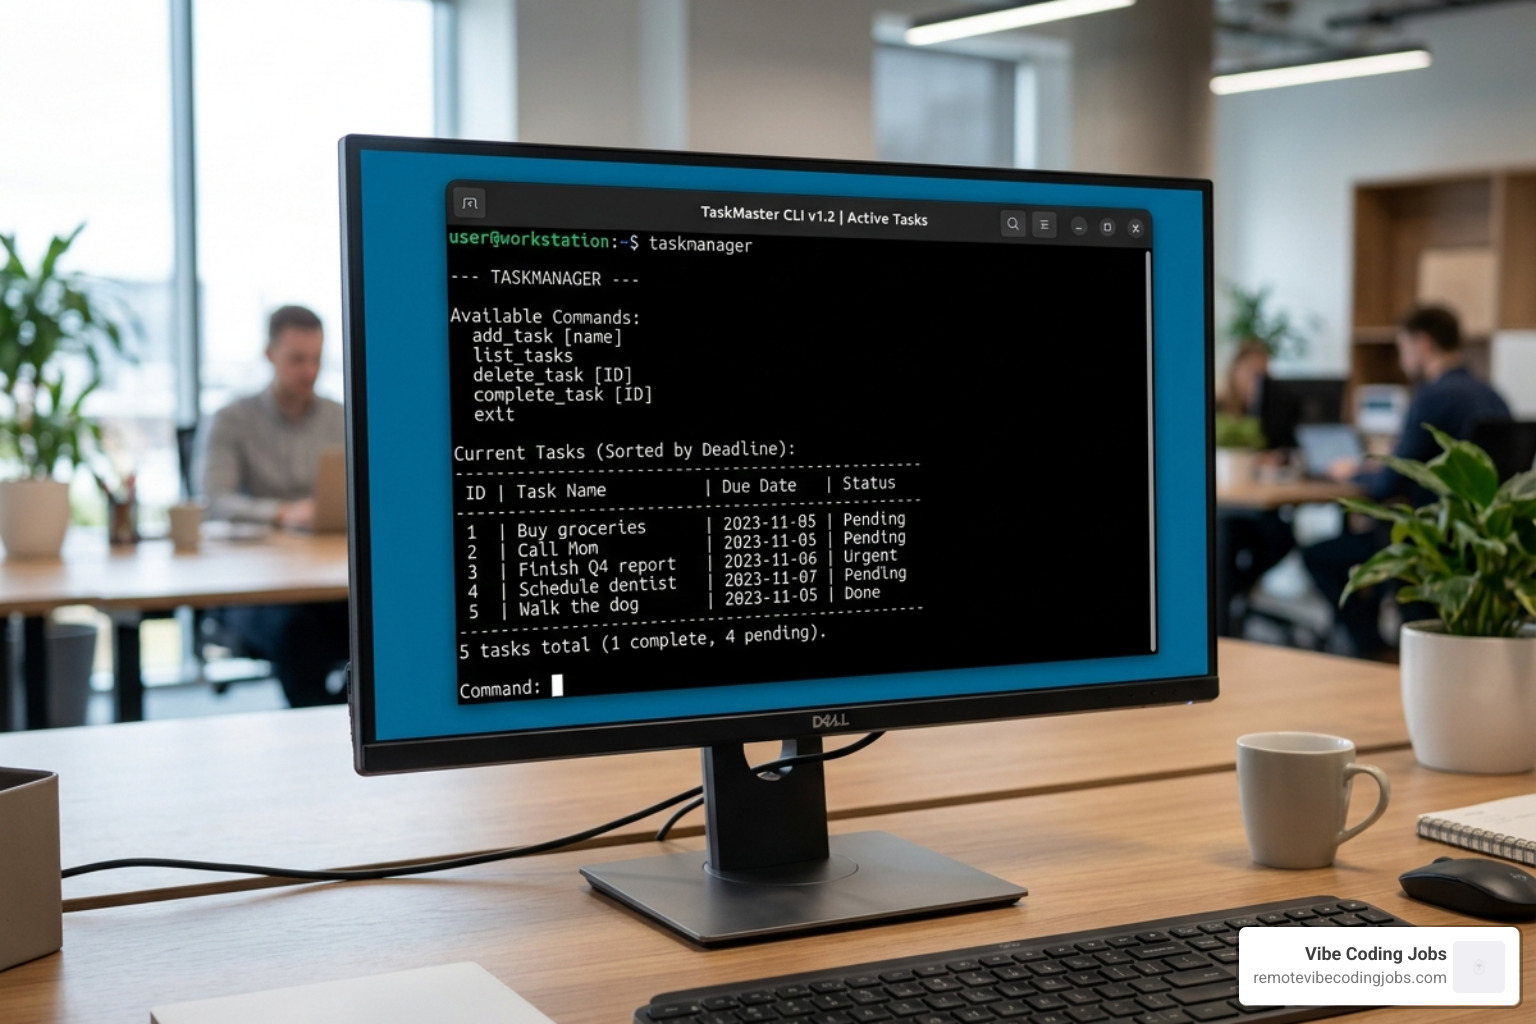
Let’s put this into practice. We are going to build a CLI Task Manager. This is a classic “beginner” app that teaches you how to handle data and user input.
Scaffolding the Project with Natural Language
First, create a new folder and initialize it:
mkdir my-task-managercd my-task-managergit initclaude
Now, give your first “vibe” prompt:
“I want to build a simple command-line task manager. It should let me add tasks, list them, and mark them as done. Let’s start by scaffolding the project structure. Use Node.js.”
Claude will likely suggest creating an index.js and a tasks.json. Before it starts, use Shift+Tab to enter Plan Mode. Review its plan. If it looks good, tell it to “Proceed.”
Implementing Features and Handling Persistence
Once the shell is built, you can iterate. Use prompts like:
- “Add a command to delete tasks by their ID.”
- “Make sure the tasks are saved to
tasks.jsonso they stay there even if I close the terminal.” - “Add a ‘clear’ command to remove all completed tasks.”
Notice we are describing the outcome, not the code. If Claude makes a mistake, don’t panic. We use “Why” loops—ask Claude, “Why did you choose this method?” It will explain the logic, which helps you learn programming fundamentals alongside the vibe coding process.
Troubleshooting and Best Practices for Novices
Even with the best “vibes,” things will occasionally go wrong. The AI might hallucinate a library that doesn’t exist, or it might break a feature that was working five minutes ago.
Handling Errors and AI Hallucinations
When Claude gets stuck in a “debug loop” (trying to fix the same error over and over), use these tools:
- Esc Key: Immediately stops Claude if you see it writing something crazy.
- /rewind: This is the magic button. It undoes the last set of changes Claude made.
- /compact or /clear: If the conversation gets too long, Claude might get “confused” by old context. These commands refresh its memory.
- Manual Verification: Never trust AI code blindly. Run the app yourself. If it crashes, copy the error message and give it back to Claude.
Advanced Prompting Frameworks
To get the best results, use the C.I.C.Q. Framework:
- Context: “We are building a Node.js CLI tool.”
- Intent: “I want to add a search feature to find tasks by keyword.”
- Constraints: “Don’t use any external libraries; keep it to standard Node.js.”
- Quality Bar: “The output should be clean, commented, and handle cases where no tasks are found.”
Frequently Asked Questions about Vibe Coding
What is the difference between vibe coding and traditional programming?
Traditional programming is like building a house by laying every brick yourself and mixing the mortar. Vibe coding is like being the foreman: you describe the layout, the “vibe” of the rooms, and the materials, while the AI (the crew) does the heavy lifting. You still need to know what a good house looks like, but you don’t need to get your hands dirty with every single brick.
Do I need to learn coding fundamentals to vibe code with Claude?
You don’t need to start with them, but you will learn them as you go. Treating Claude as a “Senior Developer” and asking it “Why” after every change is one of the fastest ways to learn. In fact, many beginners find that building real apps this way is more effective than spending months on abstract CS theory.
Is Claude Code free to use for beginners?
While there is a free version of Claude.ai, the Claude Code CLI and the advanced vibe coding workflows usually require a Claude Pro/Max subscription or API credits. Think of it as a small investment in your new superpower. Most users find the $20/month subscription pays for itself in the first few hours of saved time.
Conclusion
Vibe coding is more than a trend; it’s a shift in how humans interact with technology. It lowers the barrier to entry so that anyone with an idea can become a creator. Whether you’re building a simple task manager or a complex data dashboard, Claude is the partner that makes it possible.
If you’ve mastered these basics and you’re looking to take your skills into the professional world, check out RemoteVibeCodingJobs. We aggregate remote “vibe coding” (AI-assisted development) jobs at async-first companies. Companies are increasingly looking for developers who don’t just know how to code, but know how to use AI tools to ship 10x faster.
Ready to start your first project? Open your terminal, set the vibe, and see what you can build. For more guides and tips, visit More info about vibe coding jobs. Happy vibing!